Square API Integration
This page list of content:
- Log into or create Square account and creating a new application
- Application ID and Access Token
- Location ID
- Connect your Point of Sale API to your OctopusPro App
- Connecting your POS hardware
- Square logo when customers are saving their credit card details in the customer portal
- Square Logo in Creating a New Booking in the Customer Portal
Square Register allows individuals and merchants in the United States, Canada, Japan, Australia, and the United Kingdom, to accept offline debit and credit cards on their iOS or Android smartphone or tablet computer.
Using Square as a payment software in OctopusPro will not offer you online payment software only, it offers you an option of using and connecting OctopusPro to your Point of Sale (POS) system.
Using square POS device will give merchants fewer merchant fees, they offer a huge variety of devices from small Readers for magstripe (accept payments anywhere using a tiny card reader that connects to your mobile device and Tablet) to big cash registers, click here and you will be redirected to their POS solutions.
Log into or create Square account and creating a new application
The follow the steps below to integrate Square account with your OctopusPro account:
- If you already have a square developer account, please log in to your developer account.
- If you don’t already have an account, you can sign up for free through Square signup page.
- Once logged in, create a new application in Square.
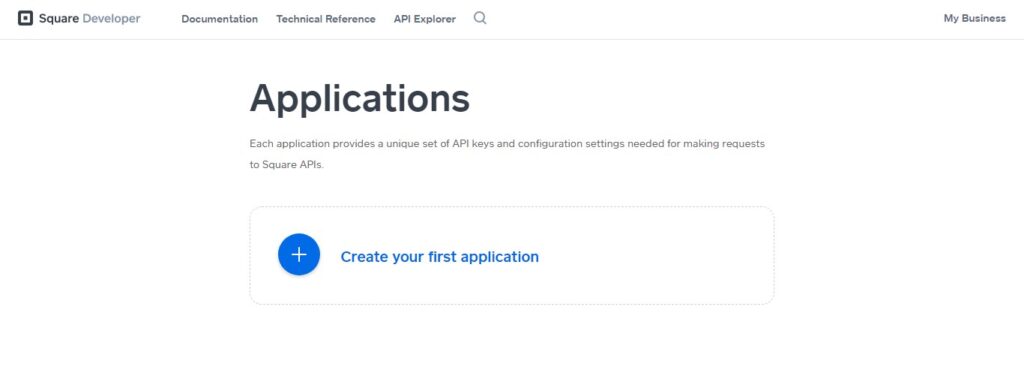
- Click the create your first application.
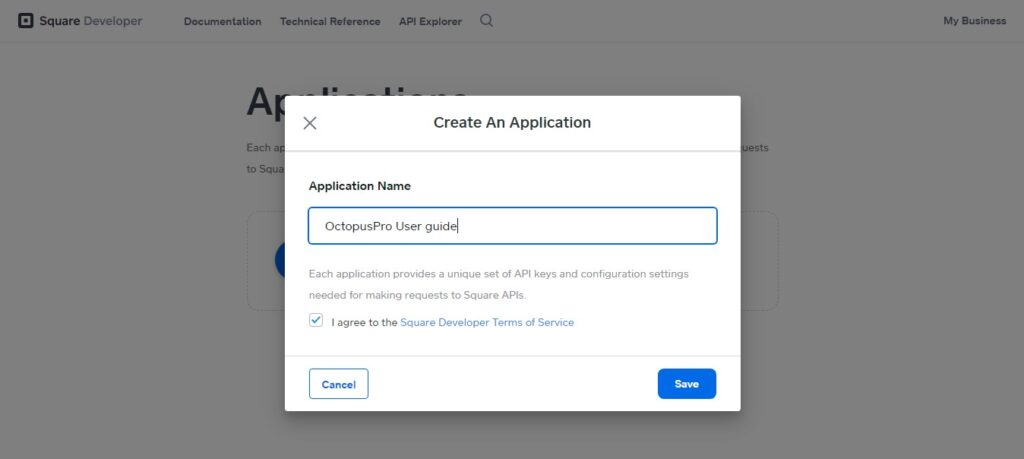
- Enter your Application Name, the Application Name will appear in your Square Dashboard for yourself and for any merchants using your application. We recommend entering your business name or trading name. Click on I agree to the Square development Terms of services check box and hit the save button.
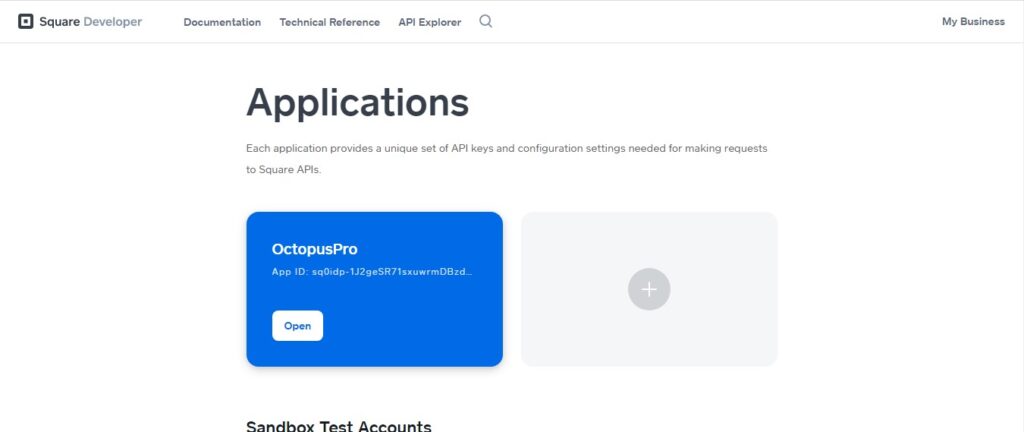
- Click open on the new application that you’ve created.
- Click on the Production tab which is located on the middle-top of the page.
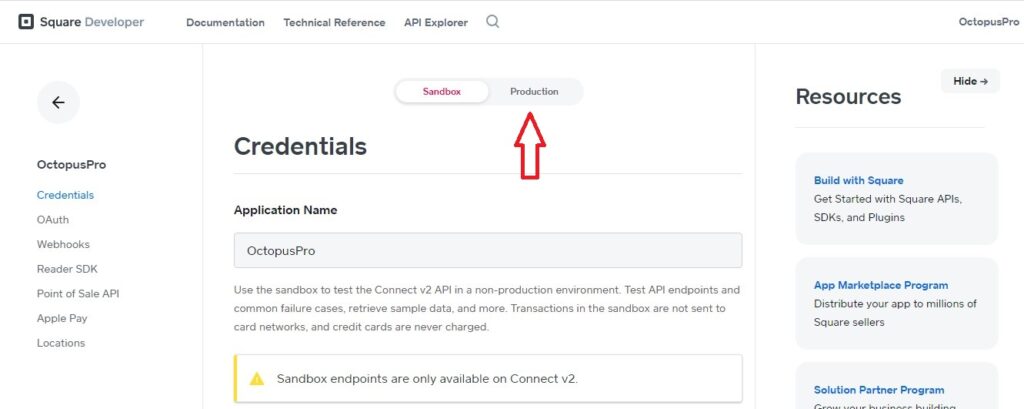
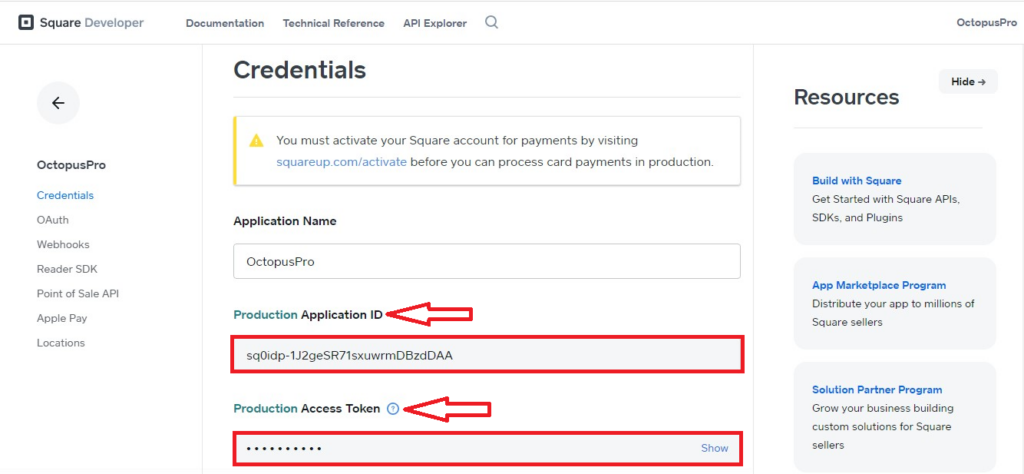
- From that page, you take two of the three keys to complete this integration the Application ID and Access Token.
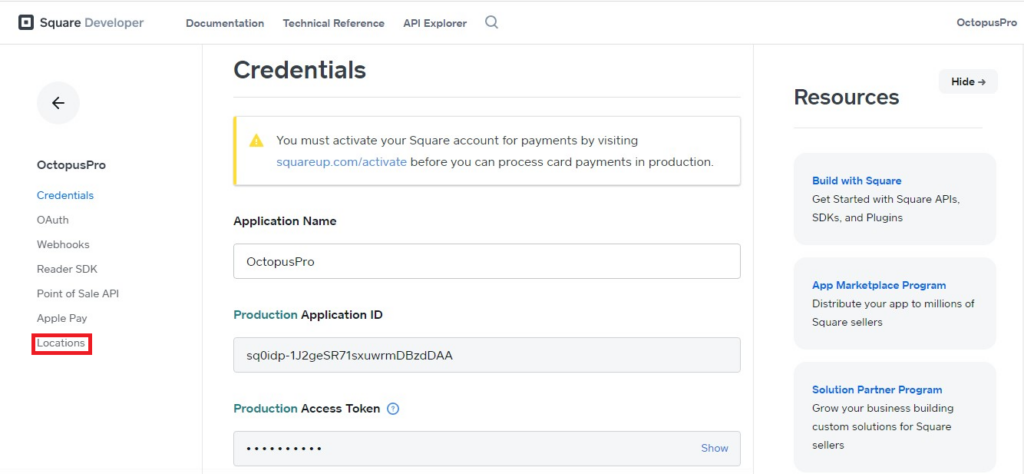
- The third and the last key you need is called location ID, for gaining that key go to locations from the side menu on the left.
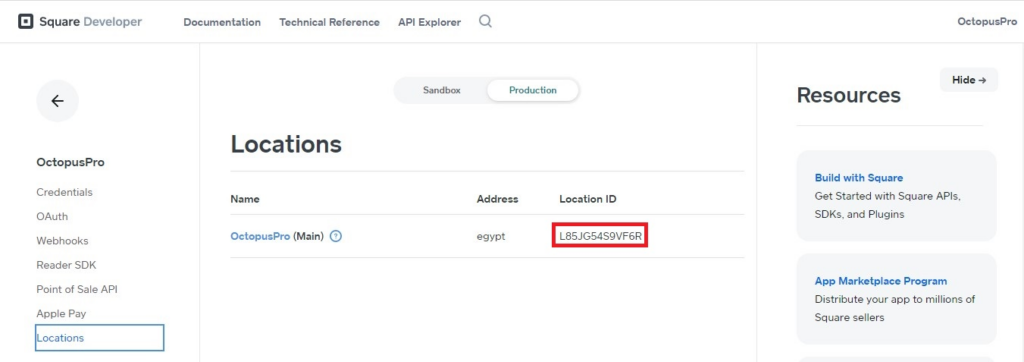
- Location ID will be in the middle left of the screen.
Go to your OctopusPro account to fill your application information.
- Login to your OctopusPro account: https://admin.octopuspro.com/login
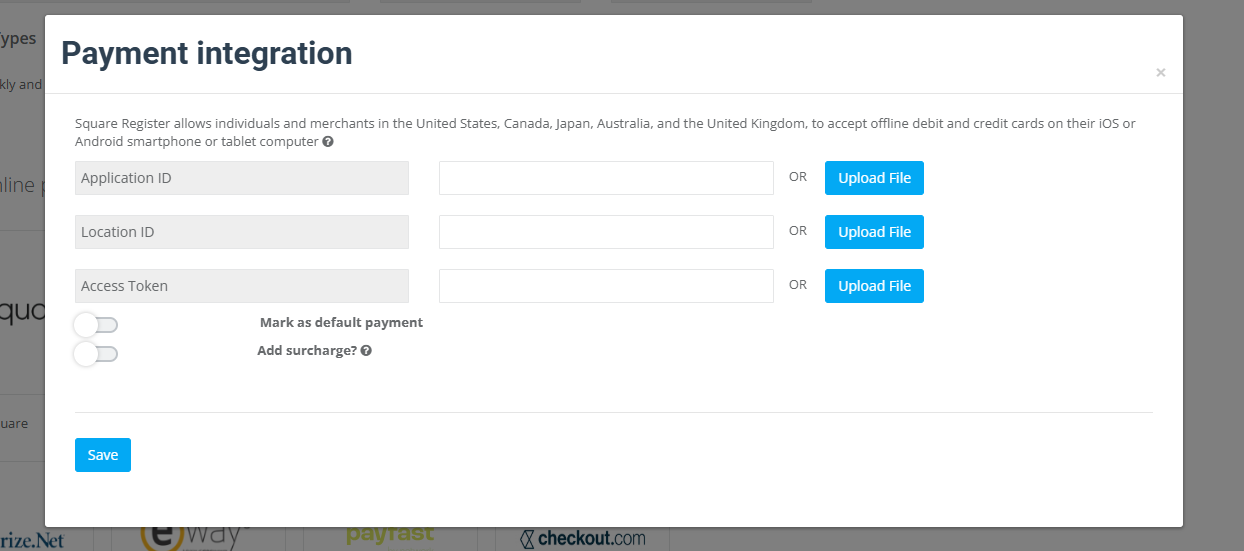
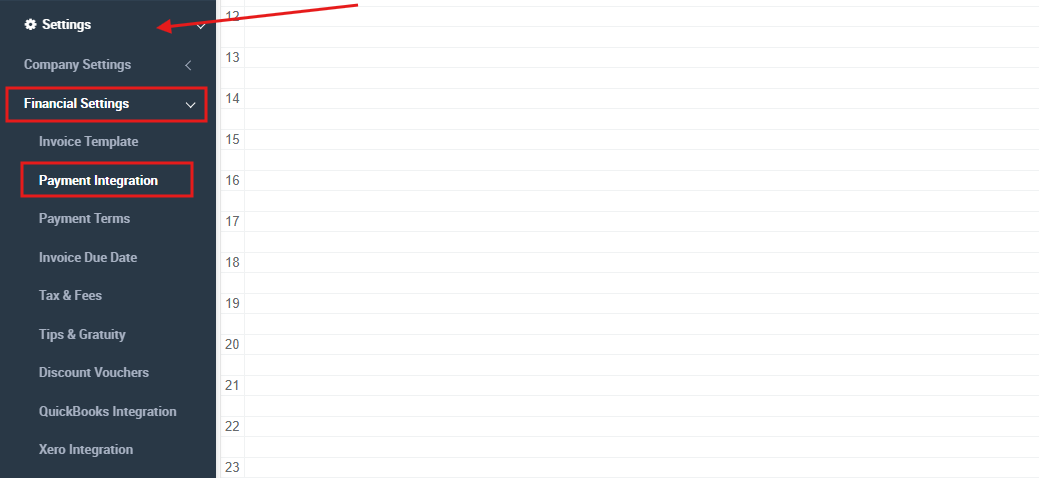
- From the left menu, go to Settings > Financial Settings > Payment Integration.
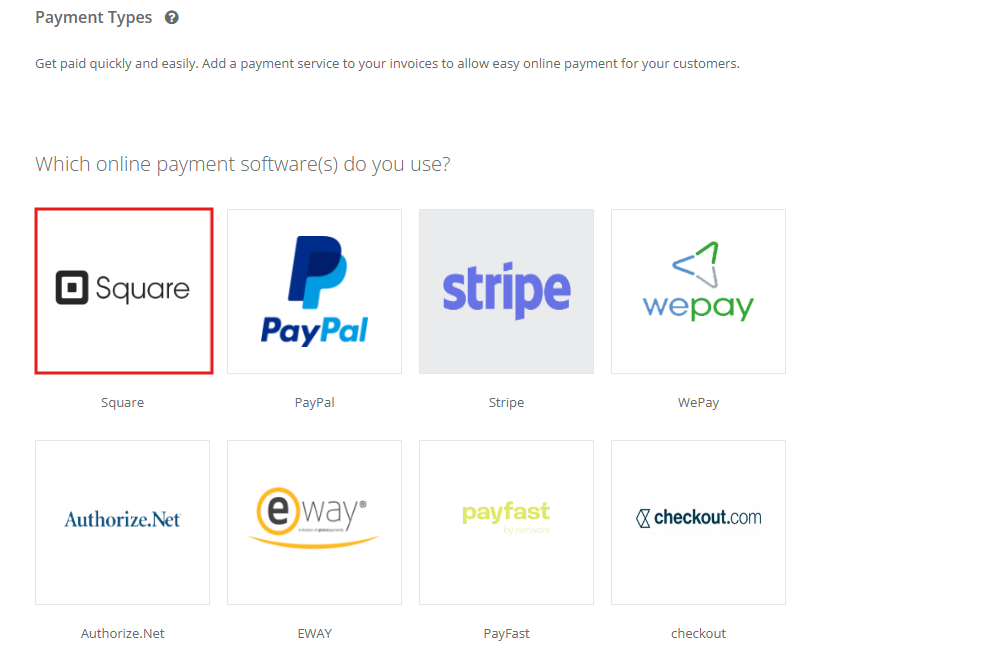
- Select Square from the list of payment gateways available.
- Enter the following values which you can get from your Square account
- Application ID
- Location ID
- Personal Access Token
Connect your Point of Sale API
Now you have to set up the API connection with your Square application, in order to get started, go back to the application you created in Square:
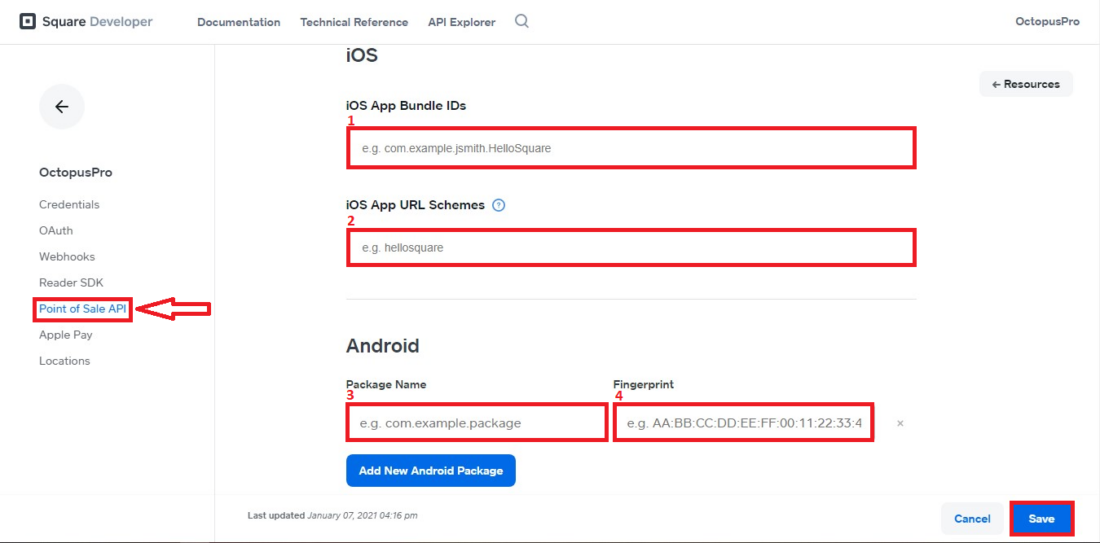
- Click the Point of Sale API link on the menu and fill in all required parameters.
- Under iOS App Bundle IDs, paste the following: com.octopuspro
- Under iOS App URL Schemes, paste the following: OctopusPro
- Click the Add New Android Package button.
- Under Package Name, paste the following: au.octopuspro.app
- Under Fingerprint, paste the following: c6:27:ea:90:a9:f6:a2:1c:1f:e3:f4:73:30:cd:24:32:a8:07:6e:89
- After filling in all information click the save button.
Note: The previously mentioned parameters are applied when you are using the OctopusPro application, If you are using a custom branded app please contact us.
Install Square on your mobile device for your fieldworkers
- Install the Square Point of Sale App on your device using one of the links below
Google Play Store: https://play.google.com/store/apps/details?id=com.squareup
Apple Store: https://apps.apple.com/us/app/square-point-of-sale-pos/id335393788
- Login to your Square account. You are now all set up!
Note: You must be logged into the Square app on the same device o process payments through the OctopusPro app.
How do I charge my customers?
- From the web: You and your office staff can add a payment to any open invoice from your account by clicking the Add Payment link under the Actions button.
- From the app: When your fieldworkers need to charge a client, they simply go the OctopusPro app, then go to the client’s booking or invoice page, then press the billing tab and click the Payment button.
- Your customers will also be able to pay their invoices through the customer portal or through the payment link you email them with the invoice.
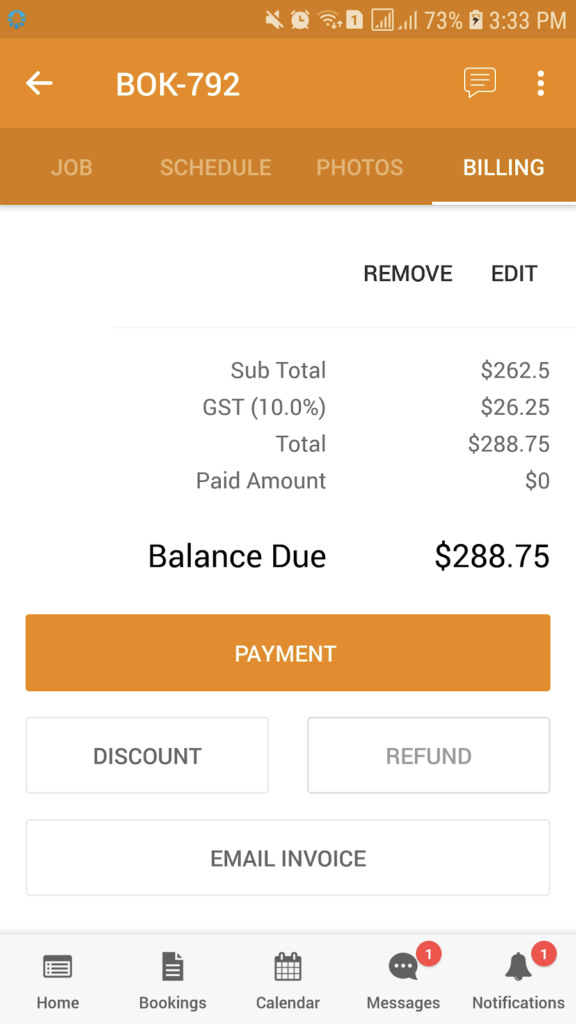
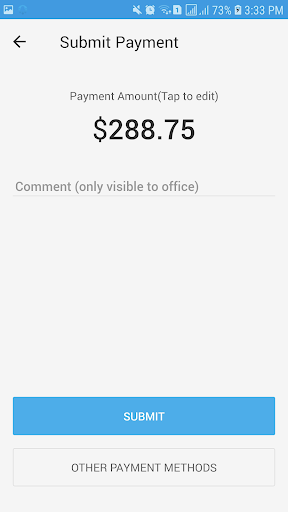
- Click the SUBMIT button, The Square app will open to continue to make payment.
- Now select the payment method from the list of options.
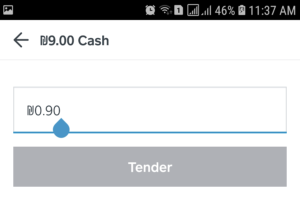
- Enter the amount then click to the Tender button.
- Press No Receipt or enter an email if you wish to email it. You can also email the receipt from the OctopusPro app later. You will then be directed to the Thank you page in Square after submitting the payment.
- Now the Square app will redirect you automatically to the OctopusPro app to register the payment in OctopusPro.
- That’s basically it! Your office users can also charge your clients through your web portal and your customers can pay for their bookings through your customer portal seamlessly without the need to install the Square app.
Connecting your POS hardware
- On the phone or tablet that you have installed Square:
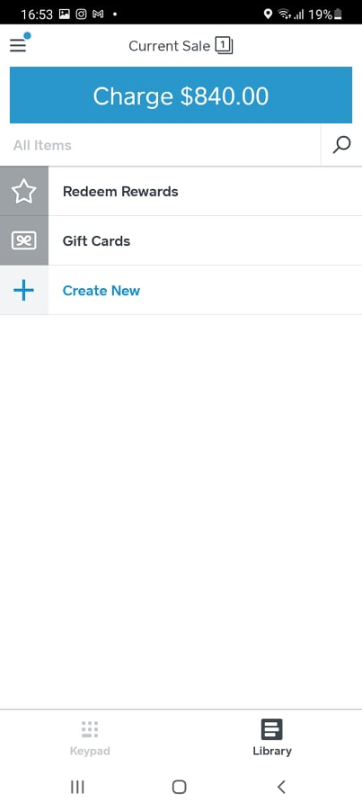
- Go to the menu by clicking on the icon on the left corner of the app interface.
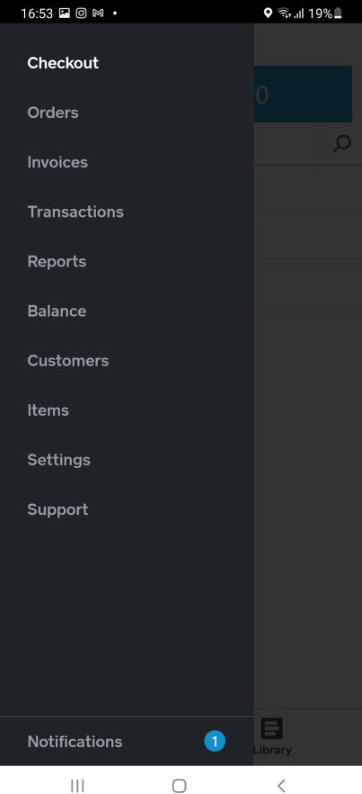
- Go to settings in the side menu that appears
- Then you need click on Hardware
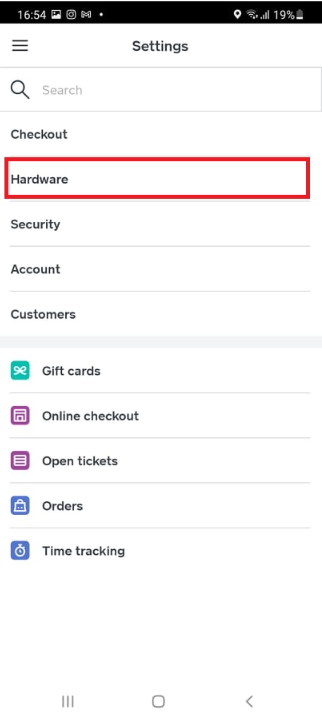
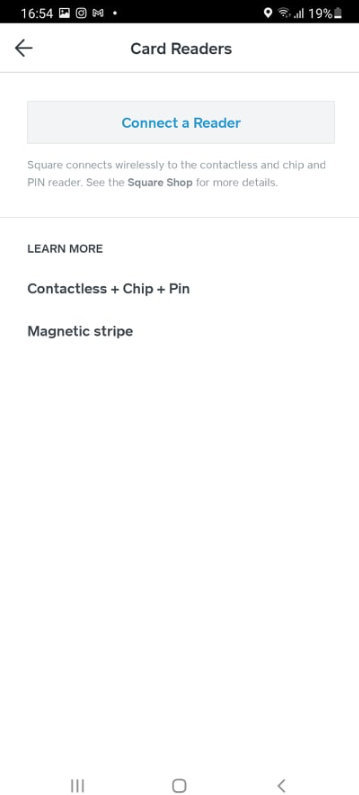
- After that click on Square Reader
- Click on connect a reader and you will connect via Bluetooth or from your charger or headphones output if you have a tablet or phone and a suitable POS device, or maybe a cable connection of you have a register device.
Square Logo when Customers are Saving their Credit Card Details in the Customer Portal
As the customer logs in to his activated account in the customer portal so they can save their credit card information the customer will be able to use the saved data in the future while creating new bookings. In order for the customer to save his credit card number he needs to follow the steps below:
- From My booking page go to “Payments”, in this page a list of all the previous payments made by the customer will appear, in order to save/edit credit card information click on payment methods at the top of the list
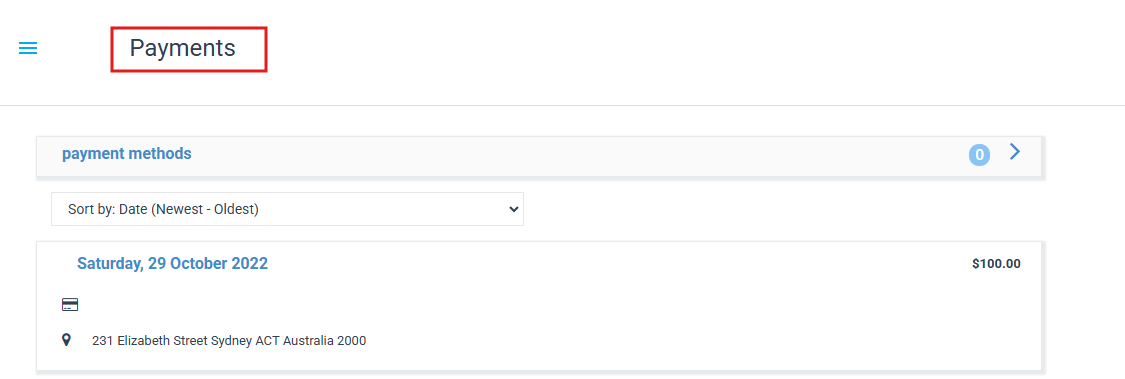
- In order to add a new card click on “+ Add a new payment method”
- Customers will be redirected to the following page, and the Square logo will appear for them.

Square Logo in Creating a New Booking in the Customer Portal
Already registered customers and guest customers will see the Square payment getaway logo in the process of creating a new booking, the logo will appear in Select Payment Method. When the customers are able to make credit card transactions in the customer portal, “Square” payment getaway logo will appear in Pay by card tap .
For more information please visit OctopusPro user guide, and subscribe to our youtube channel.

