
Enhance Customer Profiling using Custom Fields
OctopusPro brings a fresh perspective to customer profiling by introducing the option to create bespoke custom fields in your customer profiles. This dynamic feature transcends traditional profile parameters, permitting you to capture diverse data points such as birthdates, gender, specific fitness goals, comprehensive medical history, skincare regimens, real estate preferences, learning styles, risk factors, travel preferences, or any other customer-oriented preferences. This data capturing flexibility enables you to gather industry-specific or tailored data, catering precisely to your business needs.
Leverage the power of our multifaceted data types to build richer customer understanding. Our solution enables you to display selected values or protect sensitive data with a privacy-ensuring visibility flag, thereby crafting a secure and personalized customer experience. This not only offers field and office workers the necessary data to understand and meet customer needs but also reassures customers of their data security, enhancing their trust in your services.
Transform custom fields into a strategic reservoir of insights. Generate comprehensive reports from these data, equipping your sales and marketing teams with essential intelligence. Custom fields, modifiable by both your team and customers, foster a participatory relationship that enhances customer engagement and fortifies trust.
By personalizing customer profile fields, OctopusPro enables you to understand your customers on a deeper level. Irrespective of your business sector or specific needs, our custom fields emerge as a pivotal tool in efficient customer profile management, benefitting office workers, field workers, and customers alike, paving the way for improved customer relationships and business growth.
Table of contents
- How to create a new customer custom field?
- Elements Required for Creating a New Customer Custom Field
- Where does the newly created customer custom field reflect?
- How can the admin fill in the custom fields on the customer profile?
- Can the fieldworkers add customers and fill in the created custom fields on the customer profile?
Use Cases From Various Industries
Here’s a sneak peek into how custom fields can revolutionize various industries or sectors:
- Personal Fitness and Wellness: Businesses in the personal fitness and wellness industry can utilize custom fields to capture data about a client’s individual fitness goals, such as desired weight loss, muscle gain, or endurance improvement. Details about the client’s health background, including previous injuries, chronic conditions, and genetic predispositions can be gathered. Personal lifestyle choices, such as vegetarianism, gluten-free, or paleo diet preferences can be recorded to tailor a nutrition plan. Custom fields can also record data about their availability and frequency of workouts to devise a realistic and sustainable workout regime. For instance, a dropdown custom field can list various fitness goals and the client can select one that best fits their aim. This can help personal trainers, dietitians, and wellness coaches develop personalized programs that meet their client’s unique needs.
-
Healthcare Services: Healthcare providers and Medical practitioners can can utilize custom fields to capture critical information about a patient’s details. This includes their comprehensive medical history, current medications, known allergies, medical history, lifestyle habits such as smoking, alcohol consumption, and physical activity levels. Custom fields can also be set to capture ongoing treatments and scheduled appointments. A checkbox custom field can be used here to select all applicable lifestyle habits.This could assist physicians, nurses, and health workers in creating personalized care plans and monitoring progress over time.
- Cosmetic Clinics: Custom fields can collect information about a client’s previous procedures, desired treatments, skincare regimen, and any known reactions to products or treatments. This would allow clinics to provide a tailored experience and recommendations suited to each client’s unique needs.
-
Beauty and Spa Services: Beauty and spa services can use custom fields to collect information about a customer’s skin type, hair type, preferred beauty products, past treatments, and preferences. This can help the salon or spa provide a personalized service that best meets the customer’s needs and expectations.
-
Real Estate: Real estate businesses can use custom fields to collect information about a customer’s real estate needs, preferences, and budget. For instance, a realtor may want to know the type of property a customer is interested in, their preferred location, budget, and timeline for purchase.
-
Education and Training: Institutions can use custom fields to record students’ learning styles, academic interests, performance history, and extra-curricular activities. This could help educators to personalize teaching strategies and curricula, thereby improving student engagement and outcomes.
-
Insurance: Insurance companies could use custom fields to capture data about a customer’s risk factors, asset details, claim history, and coverage preferences. This would allow for tailored policy recommendations and risk assessments, providing customers with the best fitting coverage.
-
Travel and Hospitality: Businesses in this sector could employ custom fields to gather data about a customer’s travel preferences, dietary requirements, preferred destinations, and past experiences. This could enable travel agencies, airlines, or hotels to customize their offerings, enhancing customer satisfaction and loyalty.
Using custom fields in this manner allows businesses to provide a more personalized and effective service, leading to increased customer satisfaction and loyalty. This makes the custom field feature an incredibly powerful tool for businesses across various industries.
How to create a new customer custom field?
Admin users can create a new customer custom field by navigating to Settings > General Settings > Customer Profile from the side menu
- You’ll be redirected to the Customer Custom Field page, Click on Create New +
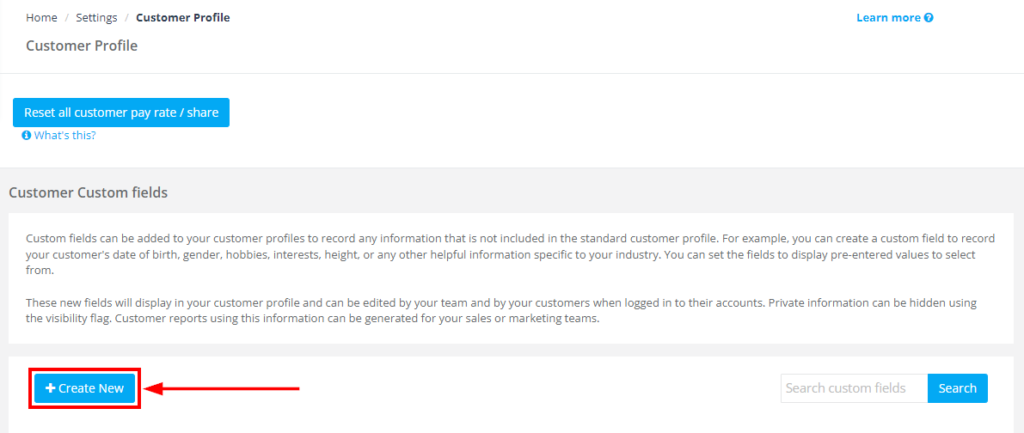
- “Create a new custom field” window will pop up
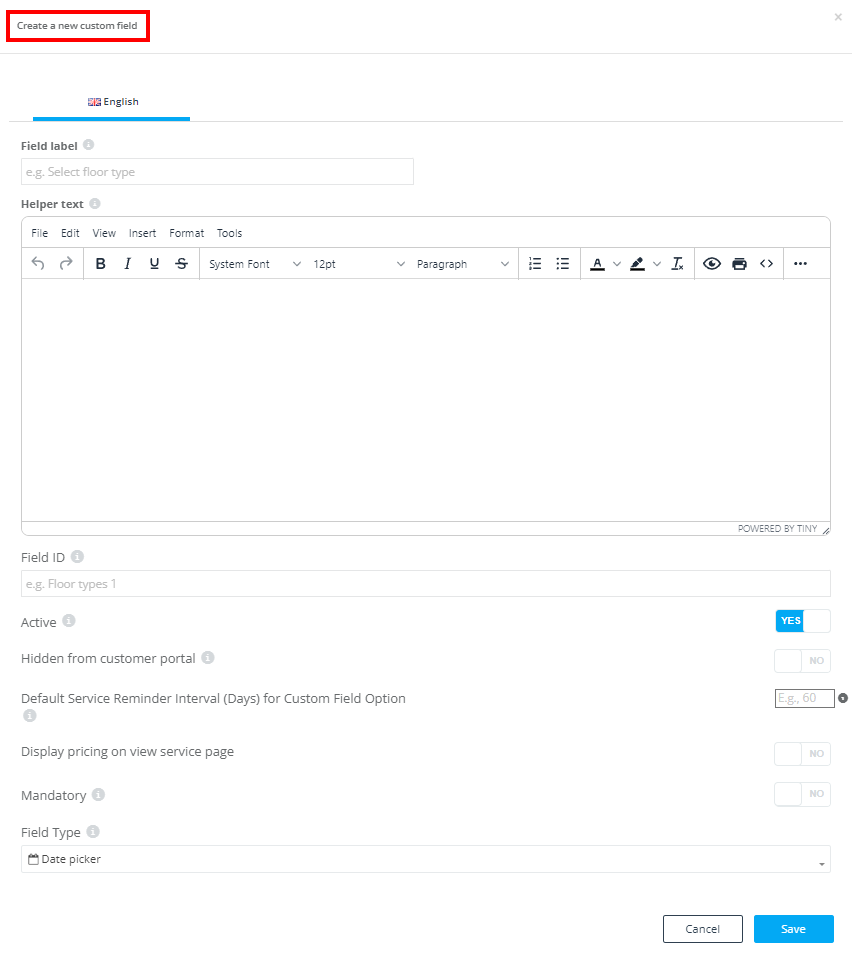
Elements Required for Creating a New Customer Custom Field
- Field label: This is the name of the new custom field that explains what is required from the customer to enter. The field label can be a single word, a short sentence, or a question with no limited number of letters. The field label appears among the custom fields list and on the customer’s profile. The field label can be for example, “Age”, “Height” “Previous Salon Used”
- Helper text: This optional field allows you to provide more details or instructions about the custom field.
- Field ID: This is a unique identifier for the custom field, allowing it to be easily distinguished from other fields. This is particularly important if you have multiple fields with the same label but for different purposes.
- Active: You have the option to make your new custom field active or not through the toggle button. If you make it active, that means the custom field will appear on the customer profile to be filled in. If you need it to be inactive for a while, switching to inactive will make it invisible on the customer profile; however, it will be listed among your custom fields on the customer custom fields page.

Hidden from customer portal: This toggle button enables you to decide if your new custom field will be visible or hidden on the customer portal, which depends on the custom field itself. If the required information needs to be filled from your customer’s side, you should keep the button disabled so the custom field appears normally to the customer.

In case the custom field doesn’t require any entry from your customer’s end and it’s only for admin users, you should enable the button so the custom field can be hidden from the customer profile.

eg: the admin of a cleaning company can create a custom field that requires the customer to enter details about the apartment that will be cleaned, so the toggle button should be disabled to be visible on the customer profile.
Display pricing on view service page: In the case that the custom field affects like pricing of the booking, you can choose to display the pricing on the service page on the customer portal. To display it, switch the toggle to “Yes”

To hide the pricing from the service page, then disable the toggle.

Mandatory: The new custom field can be optional or mandatory. You can enable the toggle button by switching it to “Yes”, so the custom field becomes required to be filled in so the profile can be completed.

If the custom field doesn’t inquire about essential info affecting the offered services, you can leave the toggle button disabled so it will be an optional field.

Field type: You can select from the dropdown menu the type that best describes the created custom field. So, depending on the needed answer from the customers, you will choose the field type as the entries can be dates, numbers, short texts, long texts… etc.
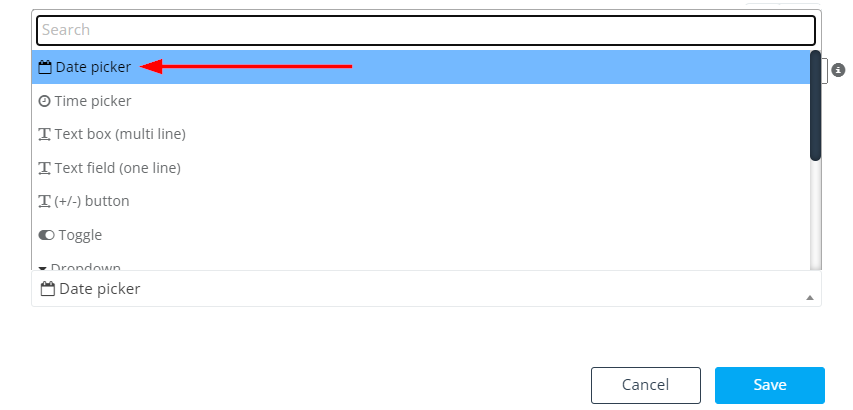
The available field types include:
- Date Picker: Date pickers allow users to select a date from a calendar popup. This ensures the date format remains consistent across all entries, thus avoiding potential confusion or errors. Users can select a specific date or navigate between months or years to find the date they need.
- Personal Fitness and Wellness: Trainers could use this field to mark the start date of a client’s fitness challenge or diet plan, facilitating the tracking of progress over time.
- Healthcare Services: Medical practitioners might use a date picker to log the date of a patient’s previous appointments, surgical procedures, or medication start dates, contributing to a comprehensive medical history.
- Education and Training: Institutions might use it to log dates for major exams or project deadlines.
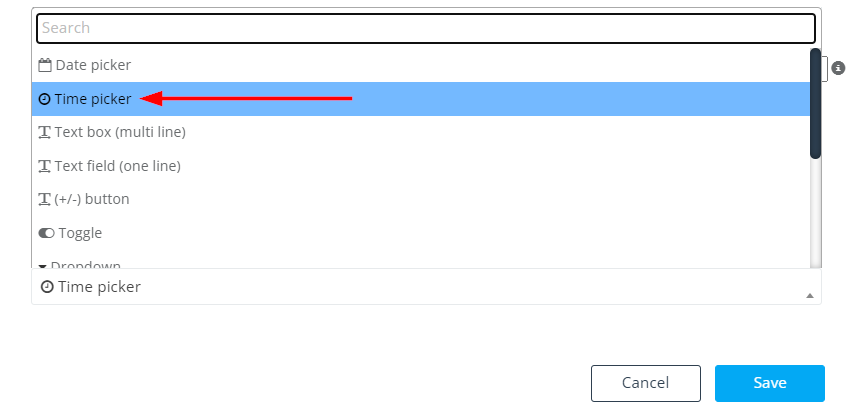
- Time Picker: Time pickers are designed to capture a specific time, with options to set hours, minutes, and sometimes seconds. Like date pickers, they maintain a consistent format for time entries, which is crucial for managing schedules and appointments.
- Healthcare Services: They can be used to schedule patient appointments or set medication reminders.
- Beauty and Spa Services: A spa could use this field to set appointments for treatments or services.
- Travel and Hospitality: Hotels could use this field for guests to specify their preferred time for room cleaning or other services.
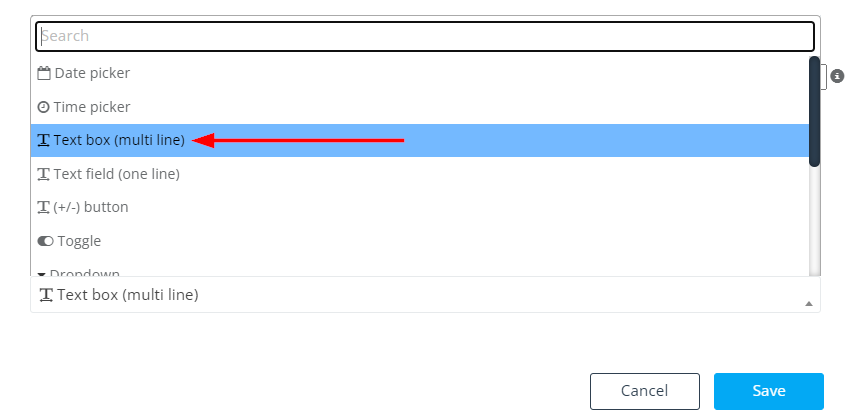
- Text Box (multi-line): Multi-line text boxes are designed to capture longer inputs, like descriptions, notes, or comments. They offer more space and flexibility, allowing users to input multiple lines of text.
- Cosmetic Clinics: These fields can be used to capture detailed notes about a client’s past procedures and desired treatments.
- Education and Training: Teachers might use these fields for students to write essay responses or detailed project descriptions.
- Real Estate: A client could use a text box to provide detailed descriptions of their property preferences.
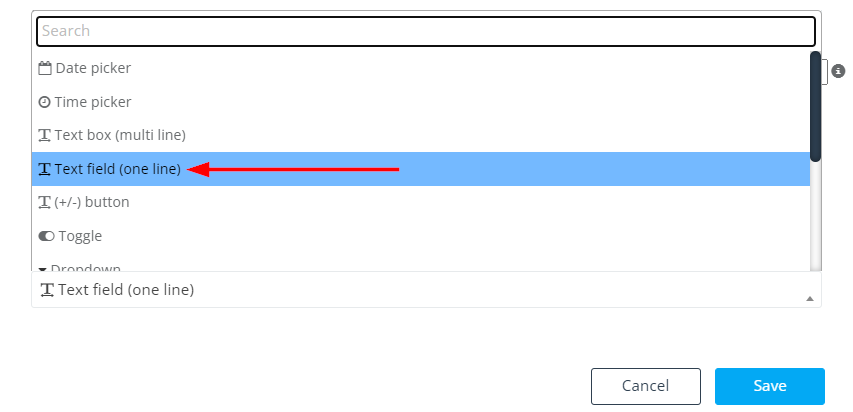
- Text Field (one line): Single-line text fields are perfect for short responses, usually no longer than a sentence. They help keep responses succinct and are great for collecting straightforward data like names, email addresses, or brief opinions.
- Personal Fitness and Wellness: This field could be used to note a client’s specific fitness goal, such as “run a marathon” or “lose 15 pounds.”
- Insurance: An insurance company might use a one-line text field for clients to specify their employment or type of residence.
- Travel and Hospitality: Businesses could use this to capture a customer’s favorite travel destinations.
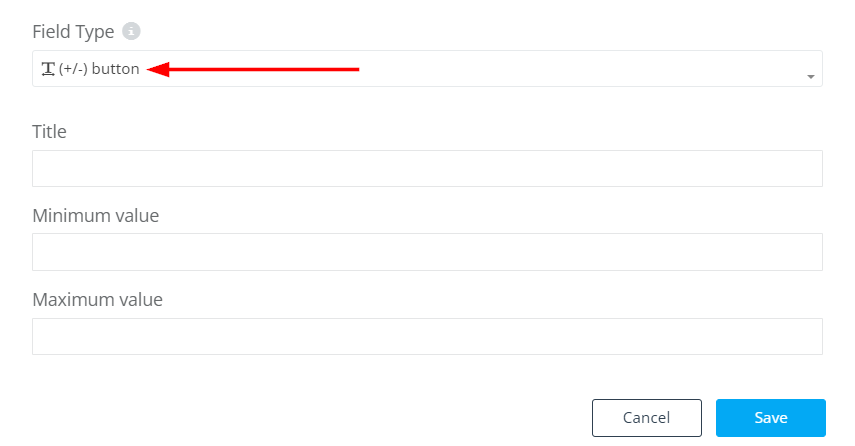
- Number Input: Number inputs are specifically designed to capture numerical data. They ensure that the data entered is purely numeric and can be constrained to a specific range, decimal places, or increments as needed.
- Personal Fitness and Wellness: This field could be used to record a client’s weight or body measurements.
- Real Estate: This might be used for a customer to input the number of bedrooms they want in a house or their budget for a property.
- Insurance: Insurance companies can use this field to capture details about a customer’s property value or the number of dependents.
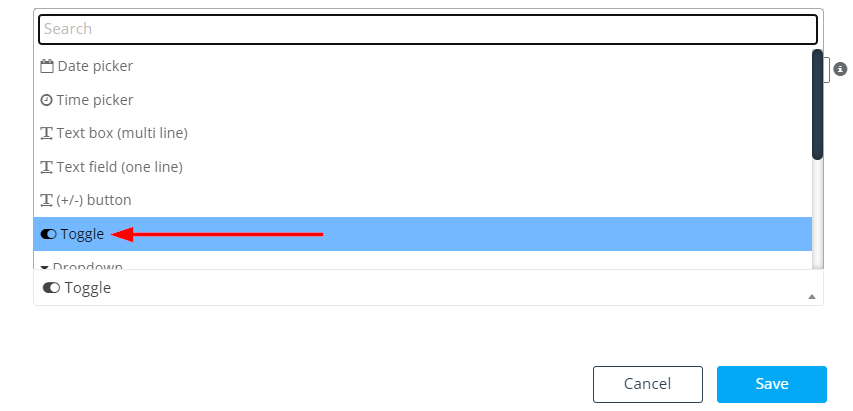
- Toggle: Toggles, often represented as an on-off switch, are used to indicate a binary choice, such as yes/no or true/false. They are intuitive and user-friendly, ideal for questions with two opposing responses.
- Healthcare Services: A toggle field could be used to indicate whether a patient is currently taking any prescribed medications, smokes, or has any chronic conditions, providing key information for treatment decisions.
- Beauty and Spa Services: Spas might use a toggle field for clients to opt into their loyalty program, newsletter, or promotional updates, helping to build customer engagement.
- Travel and Hospitality: This can be used to indicate if a customer prefers non-smoking rooms.
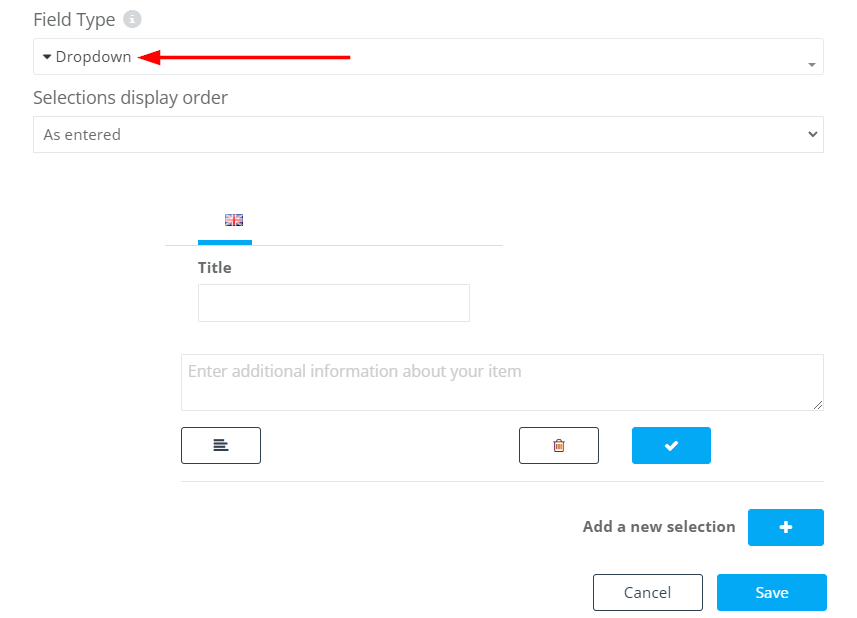
- Dropdown: Dropdowns are ideal when you want the user to select one option from a long list of predefined choices. The options are compact, displayed only when the user interacts with the dropdown, making it a great choice when screen space is limited. Dropdowns can be searchable, enhancing usability when the list of options is extensive.
- Personal Fitness and Wellness: A dropdown could be used to list a variety of fitness goals such as “Weight Loss”, “Muscle Gain”, or “Improve Flexibility”, giving the trainer a clear idea of the client’s objectives.
- Travel and Hospitality: Travel agencies could use a dropdown for customers to choose their preferred travel class, such as “Economy”, “Business”, or “First-Class”, helping to customize their travel arrangements.
- Insurance: An insurance portal could use dropdowns to allow policyholders to select coverage types like “Comprehensive”, “Third-Party Only”, or “Third-Party, Fire, and Theft”, which would influence the premiums and terms of their policies.
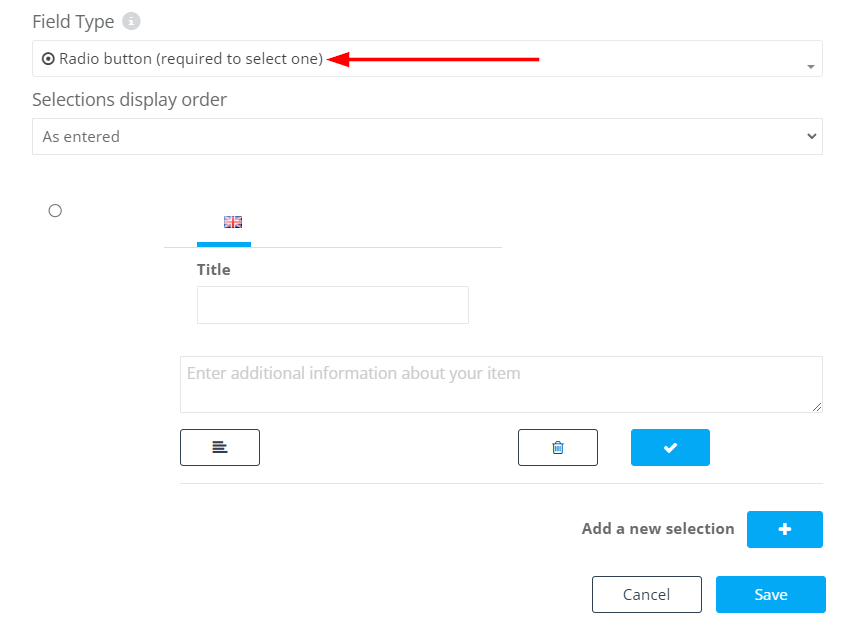
- Radio Button: Radio buttons are perfect when there’s a list of two or more options, and the user is to select only one. They are always visible (unlike dropdowns) which makes them great when you want all options to be seen at once. A group of radio buttons should be used for mutually exclusive choices that cannot be combined.
- Healthcare Services: In a patient form, radio buttons could be used for blood types such as “A”, “B”, “AB”, or “O”, ensuring precise medical records.
- Cosmetic Clinics: A clinic may use radio buttons to let clients identify their skin type like “Dry”, “Oily”, “Combination”, or “Sensitive”, which would guide the selection of suitable treatments or products.
- Education and Training: For student registration, radio buttons could indicate preferred study time, such as “Morning”, “Afternoon”, or “Evening”, enabling an optimized schedule.
- Button Group: Button groups serve a similar purpose as radio buttons but are displayed differently. All options are presented as a group of buttons, providing a more visually appealing way for the user to make a single selection from a list. They’re best used for a small number of options to avoid overwhelming the user.
- Personal Fitness and Wellness: A fitness app might use a button group for clients to select their workout intensity level, such as “Low”, “Medium”, or “High”, shaping the exercise plan to match their capabilities.
- Real Estate: Realtors could use a button group for customers to indicate their buying timeline like “Immediate”, “3-6 Months”, or “Over a Year”, which could prioritize property showings.
- Beauty and Spa Services: A salon could offer a button group to indicate a client’s skin sensitivity level such as “Not Sensitive”, “Somewhat Sensitive”, or “Very Sensitive”, informing the choice of skincare products and treatments.

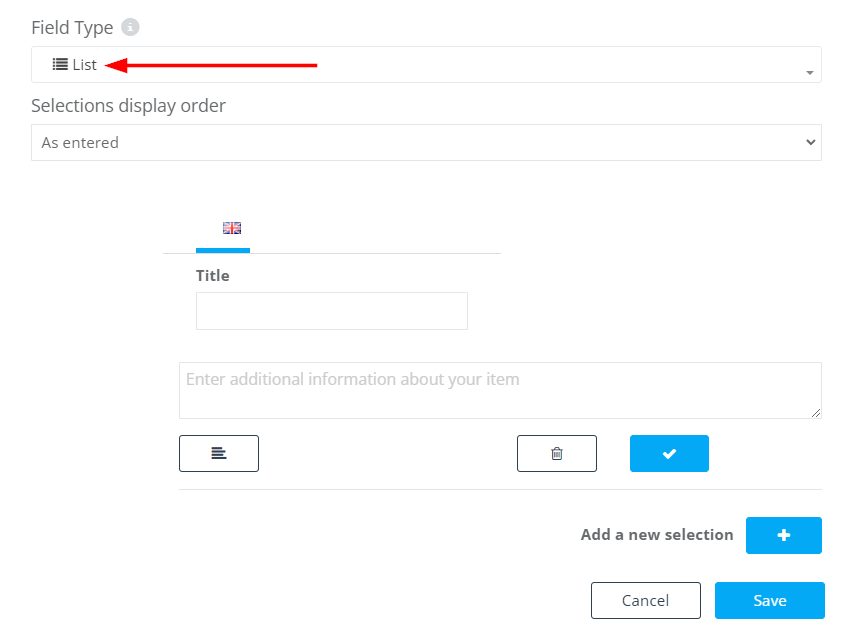
- List: A list field is used when you want the user to select multiple options from a list. These options can be presented as a scrollable list or dropdown. Users can select multiple options by clicking or tapping while holding down the control (Ctrl) or command key.
- Beauty and Spa Services: A spa could use a list field for clients to select multiple preferred services like “Massage”, “Facial”, “Manicure”, “Pedicure”, resulting in a personalized service package.
- Insurance: An insurer could use a list field for policyholders to select multiple asset types they want covered, such as “House”, “Car”, “Boat”, “Motorcycle”, to tailor their insurance policy.
- Travel and Hospitality: A travel agency could provide a list to select multiple preferred destinations, such as “Paris”, “Tokyo”, “New York”, enhancing the personalization of the travel package.
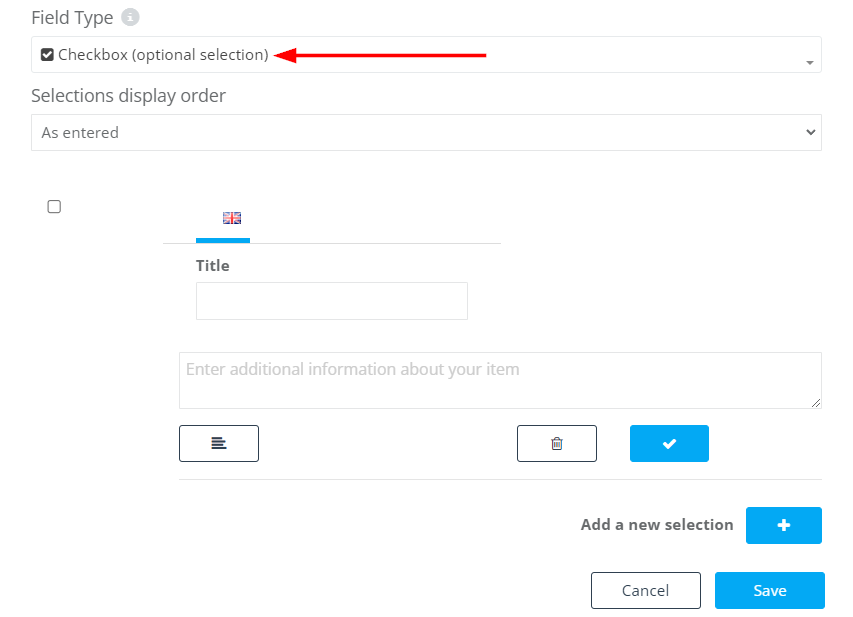
- Checkbox: Checkboxes are used when you want the user to select any number of options from a given list. These selections are not mutually exclusive, meaning the user can select all, some, or none. This is perfect for options that can occur in combination.
- Cosmetic Clinics: Clinics could use checkbox fields for clients to select multiple past procedures like “Laser treatment”, “Botox”, “Fillers”, to understand their treatment history.
- Education and Training: Educational institutions could use checkbox fields for students to select multiple extra-curricular activities they are interested in, like “Music”, “Sports”, “Art”, “Debate”, supporting holistic student profiling.
- Healthcare Services: Doctors could use checkboxes for patients to select multiple lifestyle habits, such as “Smoking”, “Regular Exercise”, “Vegan Diet”, to assess health risks and plan appropriate care.
- Checkbox Button Group: A checkbox button group serves a similar purpose to a regular checkbox field but presents each option as a button. This design choice can enhance user engagement, especially when the number of options is relatively small.
- Personal Fitness and Wellness: A fitness app might use a checkbox button group for clients to select multiple preferred workout days, such as “Monday”, “Wednesday”, “Friday”, helping to customize their workout schedule.
- Real Estate: Realtors might use a checkbox button group for customers to select multiple desired property features, like “Garage”, “Pool”, “Garden”, “Balcony”, to better match their property search.
- Travel and Hospitality: A travel agency might use a checkbox button group for travelers to select multiple activities for their itinerary, such as “Sightseeing”, “Adventure Sports”, “Museums”, or “Shopping”, providing a customized travel experience.

When setting up certain types of custom fields, including dropdown, radio button, button group, list, checkbox, and checkbox button group, two additional configuration options will become available:
-
Selections Display Order: This option lets you dictate the sequence in which your field options are displayed. You have two choices here:
- As Entered: The options are displayed to the users in the same order you entered them during setup.
- Lowest Cost First: The options are displayed depending on the lowest additional cost added to the fields.
- Highest Cost First: The options are displayed depending on the highest additional cost added to the fields.
- Alphabetical Order (A-Z): The options are displayed in alphabetical order, sorted by the first letter of each option.

You will also need to fill in the Title field, which is the visible name of your options. An extra text field appears beneath the Title field, allowing you to provide more context or explanation about each title. For instance, if you have a hair treatment option, you could use this additional field to clarify that the treatment uses non-chemical formulas. If this field is not required, you can conceal it by toggling the button located under the title field.
Once the title and any additional details are input, click on the blue button to the right of the title field to add it successfully.
You’ll also find options to edit or delete the title and details. You can add more options to the dropdown menu by clicking on “Add a new selection +” and then saving.
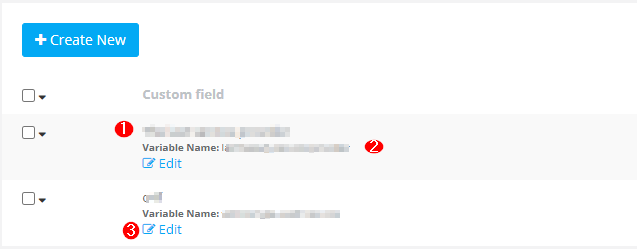
After the new custom field is saved, it will be listed on the customer custom fields page, complete with its details. Each custom field row displays:
- The custom field’s name
- Variable name: This is the ID of the field you’ve defined
- Edit: This option allows you to modify any aspect of the custom field after creation.
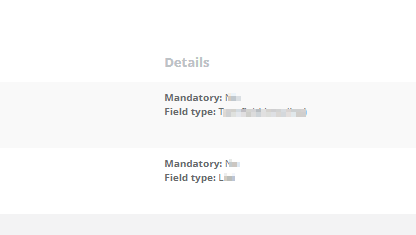
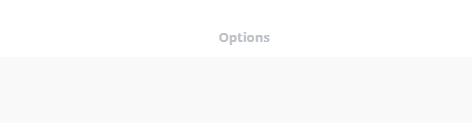
The details row below provides information on whether the field is mandatory and the field type. The options row presents the choices available for the customers to select from, assuming the field type is one of the following: Toggle, dropdown, radio button, button group, list, checkbox, or checkbox button group. For field types like Date picker, time picker, text box, text field, and button, the options next to the custom field will be blank, as these types do not contain predefined choices for customers to select from.
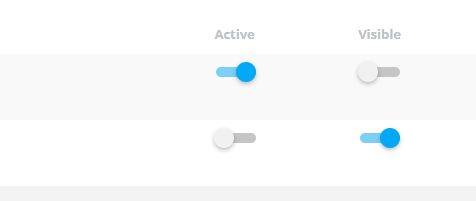
In addition, you’ll see “Active” and “Visible” buttons for controlling the activation and visibility of your custom fields.
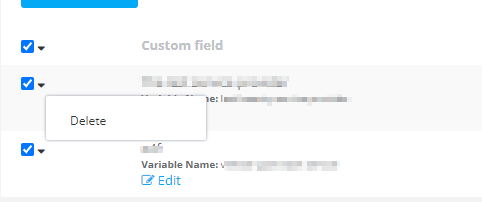
You can use the search box to quickly find a specific custom field, and if you wish to remove a custom field, simply check the checkbox next to it and then click on the down arrow to delete it. To remove all custom fields at once, mark the checkbox at the top of the list to select all, then click the down arrow and select ‘delete all’.
Also, you have the option to delete the added title and edit it from the buttons below:
To add the rest of the options to the dropdown menu, click on “Add a new selection +” and then save.
After saving the new custom field, the created custom field is going to appear on the customer custom fields page with the details of the custom field.

In the custom field row, you’ll find:
- The name of the custom field
- Variable name: The field ID you already wrote
- Edit: You can use it to edit any detail of the custom field after creating.
In the details row, you’ll find:
- Mandatory
- Field type
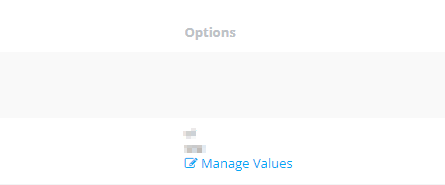
In the options row, you’ll find:
If the field type is “Date picker, time picker, text box, text field, button”, the options next to the custom field will be empty as those field types do not include choices the customer will select from.
On the other hand, if the field type is “ Toggle, dropdown, radio button, button group, list, checkbox, checkbox button group” you are going to find the entered options that the customers will select from next to the custom field.
You will also find “Active” and “Visible” buttons as the last rows to control the activation and the visibility of the custom fields.
*Please note that you can search to find the custom field you want from the search custom fields box and you can delete any custom field by checking in the checkbox next to the custom field then click on the down arrow to delete. Also, all of the custom fields can be deleted by marking the checkbox next to the custom field to select all then click on the down arrow and select delete all

Where does the newly created customer custom field reflect?
When admin users create a new customer custom field, it appears on the customer profile in the customer portal, so the customer can fill it in. This can be found in the customer portal through the following:
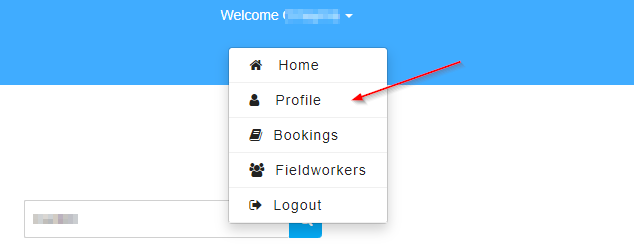
- From the customer portal < Welcome “Customer’s name” < Profile
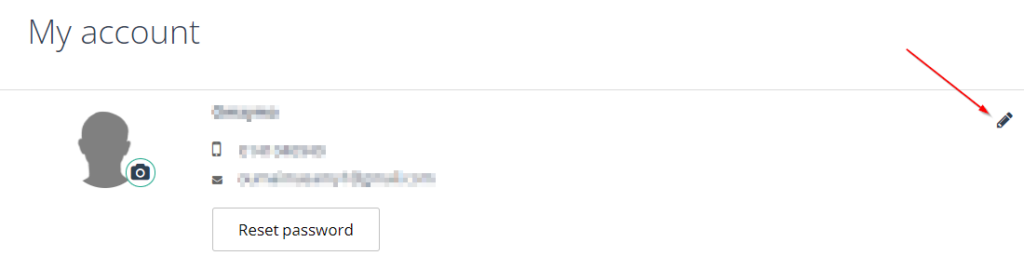
Click “Edit” on My account page
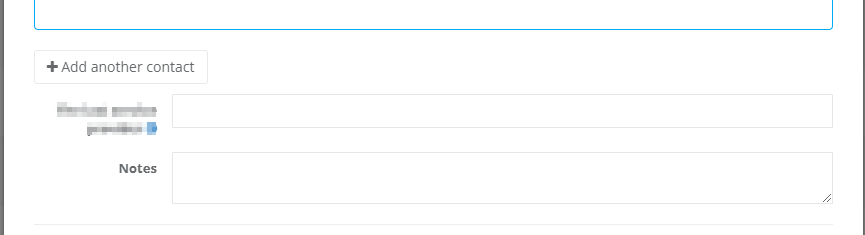
The created custom fields will appear under “Add other contacts”

And once the custom fields are filled from the customer’s end, they will be added under the “basic info” of the customer on the My account page.
How can admin users fill in the custom fields on the customer profile?
Admin users can enter the required info on the customer profile from the admin user’s dashboard.
- From the side menu, select customers < All customers
- Select actions button next to the customer name < Select edit details
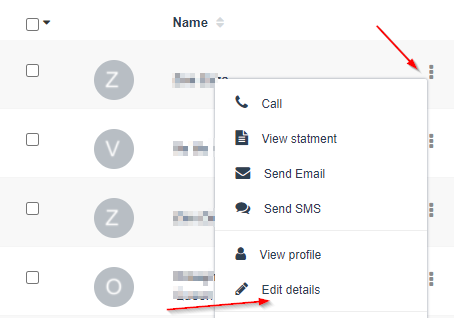
- Enter the required information in the custom field under “Add another contact”
Can the fieldworkers add customers and fill in the created custom fields on the customer profile?
Yes, the fieldworkers, by default, can add customers and fill in the custom fields added on behalf of the customers through the following steps:
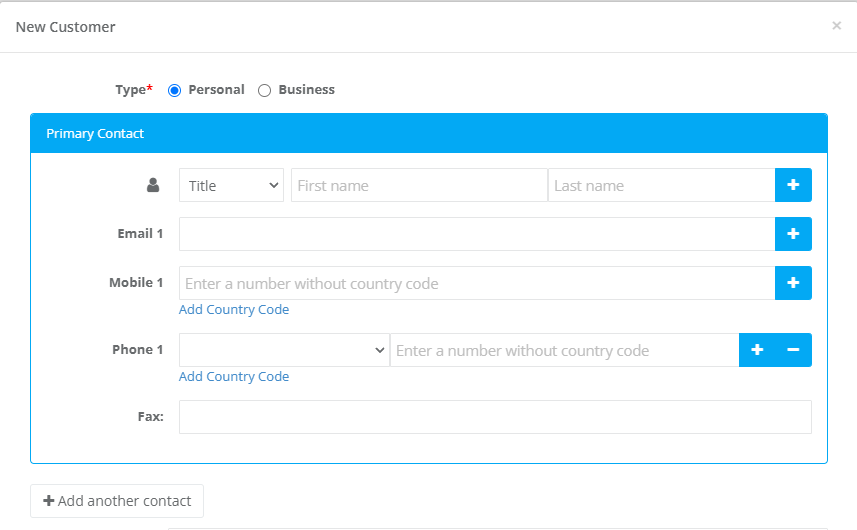
From the website
- Click on New+
- Select New customer
- Fill in the pop-up form and save
From the app:
- Click on the Menu
- Click on Create a new booking
- Click on +New customer
- Fill out the form

- Press “Add new customer”
To stay updated, please subscribe to our YouTube channel.