Fieldworker App: Invoicing, Payments, Deposits, and Refunds
OctopusPro’s Fieldworker App is a powerful tool that digitizes the financial aspects of field services, making invoicing, payments, deposits, and refunds more manageable and efficient.
Benefits:
For Fieldworkers, the app eradicates paperwork, allowing quick access to financial transactions and reducing errors. Admins benefit from real-time insights into field transactions, ensuring consistent data and easy oversight of refund requests. Customers receive instant digital invoices and enjoy multiple payment options, with the added trust of real-time billing and digital signatures. The app also ensures swift and tracked refund processes.
Use-Cases:
Imagine completing a lawn service; before leaving, a digital invoice reaches the customer’s email. After a plumbing job, customers can choose their preferred digital payment mode. If a service is found lacking, initiating a refund is straightforward. The admin is notified, and the issue is resolved efficiently.
Navigating Your Invoices:
- Viewing Your Invoices:
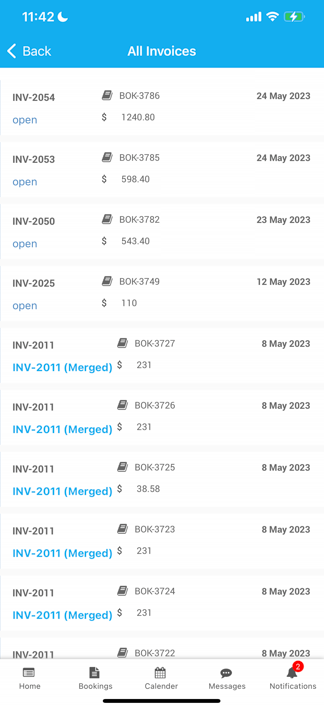
- Access: Tap on the main menu > Invoices.
-
- Selecting an Invoice: Specify the type of invoice you’re interested in. Once done, tap on any invoice to delve deeper.
Collecting Payments Post-Service:
- Taking Payment After Job Completion:
- Access: Navigate to the specific booking.
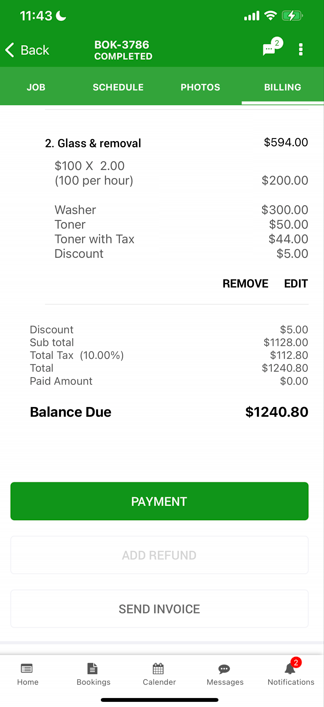
- Billing Details: Tap on the Billing tab.
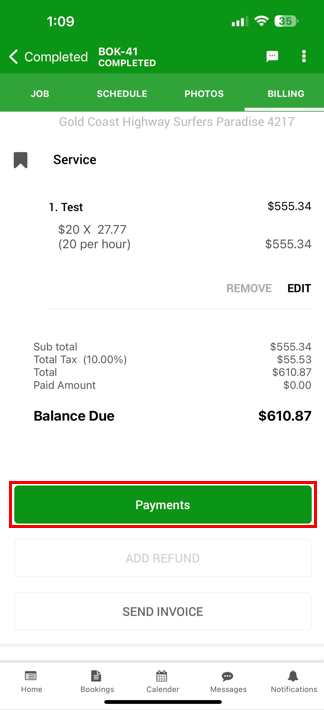
- Initiating Payment: Scroll to the page’s end and select PAYMENT.
-
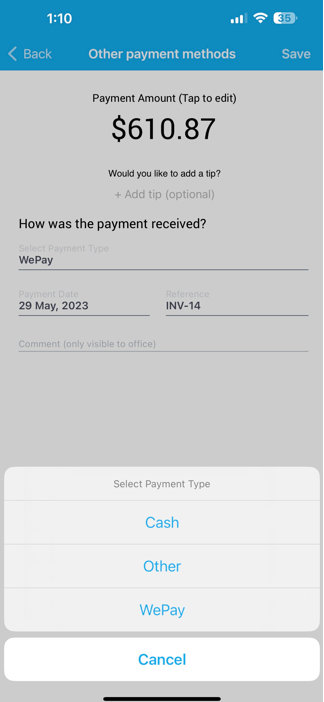
- Payment Confirmation: Verify the payment sum, choose your payment mode, and tap Save.
Sending Invoices to Clients:
- Emailing Invoices:
- Access: Head to the relevant booking.
- Billing Information: Click on the Billing tab.
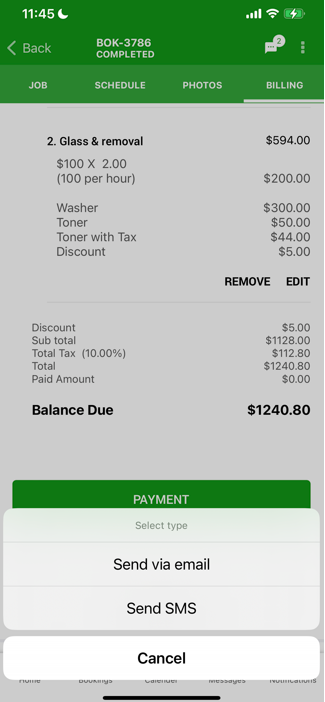
- Invoice Dispatch: Click Email Invoice to instantly send the invoice to the customer’s registered email.
Acquiring Client’s Confirmation Post-Service:
- Getting Customer Signature for Job Completion:
- Access: Go to the particular booking.
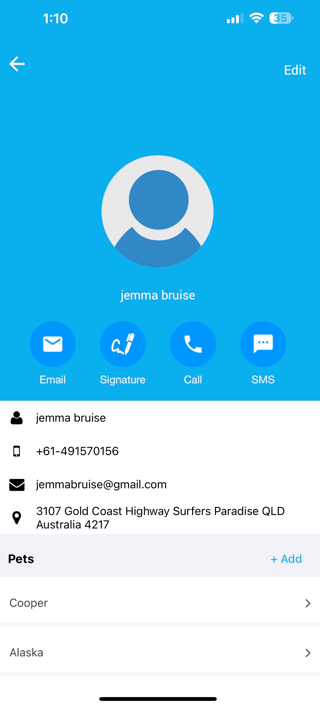
- Customer Details: Click on the customer’s name.
-
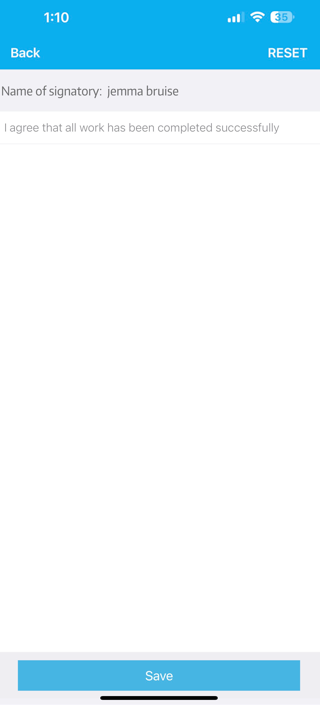
- Acquiring Signature: Tap on the Signature icon. Hand your device to the customer for signature.
-
- Saving Signature: Once signed, click ‘Save’.
Handling Refunds:
- Reviewing Refund Reports:
- Access: From the main menu, select Invoices.
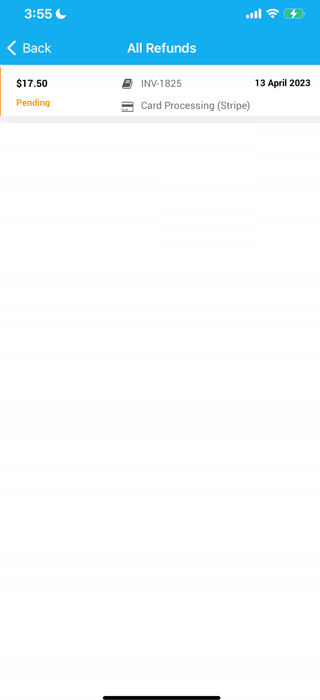
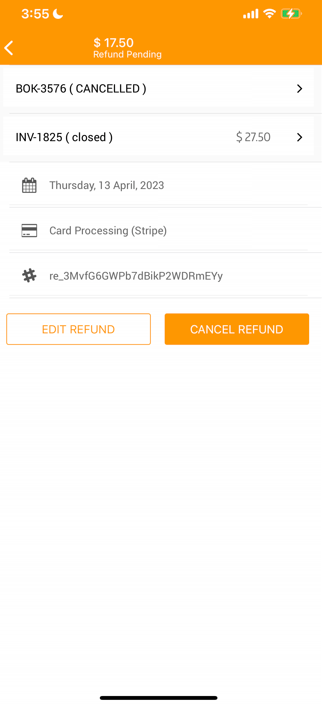
- Refund Overview: Click Refunds to access an exhaustive list of processed refunds.
-
- Detailed View: For a more granular view, tap on any specific refund.
- Initiating a Refund:
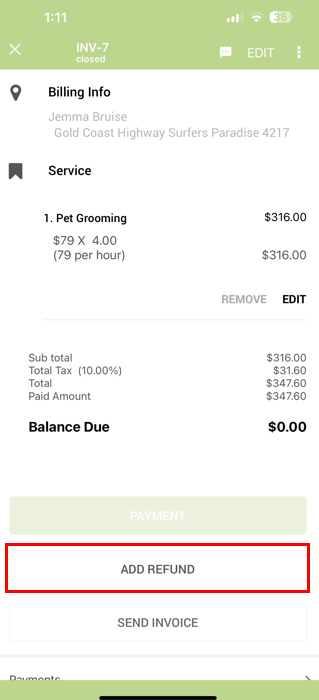
- Access: Navigate to the pertinent booking.
- Billing Information: Tap on the Billing tab.
- Request Refund: Scroll to the bottom and select ADD REFUND.
-
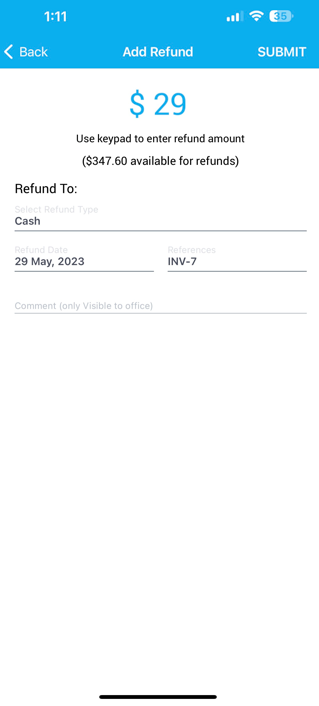
- Refund Details: Choose the appropriate refund payment channel, provide all necessary details, and importantly, elucidate the refund’s reason in the comment box.
-
- Final Step: Click REFUND. This sends a refund request to the office for scrutiny. Post-approval, you’ll be authorized to process the refund to the client.
Deposits
- Collecting a Deposit:
- Access: Navigate to the desired booking.
- Billing Section: Click on the Billing tab.
- Initiate Deposit: Click on PAYMENT.
- Finalize Deposit Amount: Confirm the deposit sum, choose the payment method, and click Save.
- Returning Deposits:
- Similar to the refund process, if the service requires the return of deposits, you can process it through the Billing tab, selecting ADD REFUND instead.
To stay updated, please subscribe to our YouTube channel.

